
Ditch / Field notes
10 Minute Audit to Make Construction Before and After Photos Defensible
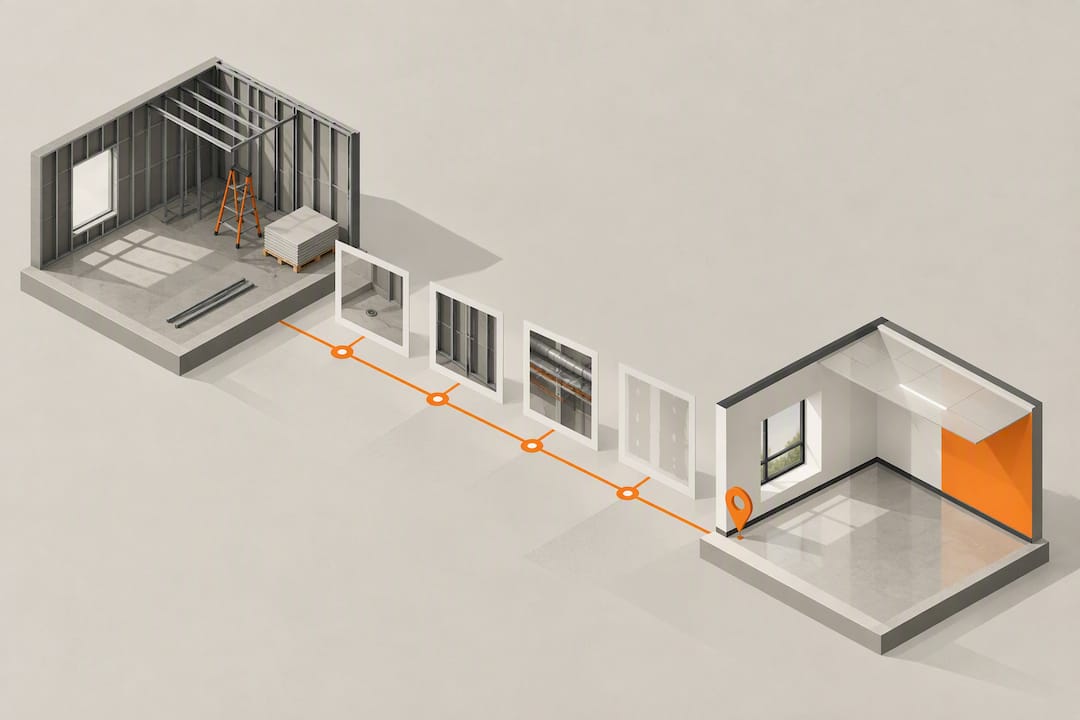
A defensible before and after construction photo is a dated, location-pinned image kept with its original file and indexed to project metadata, so it proves what existed, when the work happened, and who did it. Anything less is just a snapshot. If you’re shooting jobsite photos for progress tracking, quality control, or claims, the stamp, the storage, and the tagging matter more than the picture itself.
TL;DR:
- Properly stamped photos with visible date, time, GPS coordinates, and address are essential for legal defensibility and must be stored in their original unaltered format.
- Capturing before-cover-up shots of rebar, wiring, or waterproofing immediately prior to concealment is critical, as these are the highest-value evidence points on the project.
- Regular photo audits, automated tagging, and mapping to site plans significantly improve retrieval speed and maintain accurate documentation throughout the project.
- Assigning specific team members to photograph at designated stages ensures consistent quality and coverage aligned with billing and project milestones.
- Integrating photo platforms with project management systems enables instant association of images with tasks, phases, or change orders, streamlining communication and claims processing.
Table of Contents
- Building a Capture Schedule for Progress Photos
- The Rules That Make a Photo Hold Up
- Tagging and Mapping Photos So You Can Find Them Later
- A Crew Routine You Can Actually Run Every Day
- Legal and Privacy Rules for Jobsite Photos
- Turning Photos Into Communication Tools for Stakeholders
- Connecting Photo Records to Project Management Software
- Why Disciplined Photo Records Pay Off Beyond Documentation
- How Ditch Turns This Playbook Into a Daily Habit
- Sources
- FAQ
Building a Capture Schedule for Progress Photos
You don’t need to shoot everything. You need to shoot the right things at the right moments, and miss none of the windows that close fast. A rebar layout gets buried in concrete within hours. Rough-in gets sealed behind drywall on a schedule the framer sets, not you.
Here’s the capture rhythm that covers a typical job from groundbreak to closeout:
- Pre-construction baseline. Shoot the site, adjacent structures, fences, landscaping, and any existing damage or survey markers before a single tool touches the ground. This baseline is what protects you when a neighbor claims your crew cracked their driveway.
- Before-cover-up shots. Capture rebar, conduit sleeves, waterproofing, and rough-in wiring or plumbing in the last hour before it gets concealed. Once drywall goes up or concrete pours, that evidence is gone for good, a point the before-cover-up documentation standard treats as non-negotiable for concealed work.
- Progress cadence. Shoot regularly during active trades (framing, MEP roughs, finishes) and with less frequency during slower phases. MasterSpec’s periodic photographic documentation clauses recommend regular periodic intervals as a baseline, typically tied to payment draw cutoffs.
- Special captures. Photograph deliveries the moment they arrive (before anyone signs for damaged material), any safety incident, and a full final completion set for owner handoff.
Miss the before-cover-up window and you’re stuck explaining a change order with no proof it was needed.
The Rules That Make a Photo Hold Up
A photo that looks convincing and a photo that survives a dispute are two different things. The gap between them comes down to five habits.
- Burn a visible stamp into the pixels. Date, time, GPS coordinates, and a human-readable address should appear on the image itself, not just buried in EXIF data that gets stripped the moment someone texts the photo or uploads it to a cloud folder. The TimeStamp Camera evidence checklist treats a visible stamp as a baseline requirement, not a nice-to-have.
- Use network time, not device time. A phone with its clock off by six hours produces a photo that contradicts your own daily log. Sync to network (atomic) time and the stamp becomes trustworthy on its own.
- Keep the original file. Store the unedited original alongside any annotated or cropped share copy. If a claim ever goes to arbitration, the chain from raw capture to shared image needs to be unbroken.
- Back up to two destinations the same day. One local, one cloud, minimum. A lost phone shouldn’t mean a lost record.
- Audit a sample weekly. Pull a handful of recent photos and check the stamp, the GPS pin, and the tag. Configuration drift, a phone that lost GPS lock, a setting that reverted, catches teams off guard more often than outright loss.
Pro Tip: Assign one person per crew to run the weekly audit. It takes ten minutes and it’s the difference between catching a dead GPS chip in week two versus discovering it in month four, after 40 days of untagged photos.
One more rule matters as much as any technical stamp: shoot what shows deviations and progress, not everything indiscriminately. The AIA guidance on jobsite photography warns that a photo showing an unreported defect can create liability if nobody flagged it at the time. Volume isn’t the goal. Coverage of what matters is.
For final completion sets and owner-facing deliverables, bringing in a professional photographer is worth the cost. Daily progress shots don’t need that polish, but the images that go into a closeout binder or a marketing portfolio do.
Tagging and Mapping Photos So You Can Find Them Later
A photo with no tag is a photo you’ll never find again in a folder of 4,000 images. The AACE recommended practice for construction photography frames capture as a planned process, not a random accumulation, and that planning starts with metadata fields decided before day one.
At minimum, every photo needs:
- Capture timestamp and GPS location
- Project or job tag
- Crew or subcontractor name
- Construction stage (rough-in, framing, finish)
- Activity type (electrical, plumbing, structural, punch list)
Pin each photo to a floor plan or a site grid coordinate, not just a folder labeled with a date, to improve construction document control for project managers. A study on jobsite photo capture found that mapping images to plan locations, then letting a team search by location, cuts retrieval time dramatically compared to scrolling through a camera roll by date. That’s the difference between finding a photo in ten seconds during a client call and stalling the conversation for ten minutes.
Naming conventions matter too. A consistent format, project code, date, stage, sequence number, keeps payment packets and claims documentation organized without anyone needing to remember which folder holds what.
Pro Tip: Automated tagging, OCR reading of equipment nameplates, and location pinning turn a photo roll into a searchable database. That’s the shift from “we have photos somewhere” to “pull up every rough-in shot on the third floor from March.”
A Crew Routine You Can Actually Run Every Day
Rules on paper don’t help if nobody follows them at 4:45 PM when the crew wants to go home. Build the routine around roles, not good intentions.
- Assign the shooter. One person per crew or trade owns the camera for that phase. Rotating shooters means inconsistent angles and missed windows.
- Follow the 3-shot rule. Wide shot for context, medium shot for detail, close shot for the specific defect or completed item. A complete guide to construction photo documentation recommends this pattern for every documented item, plus a reference object like a tape measure when scale matters.
- Match the angle for after shots. When photographing a repair or punch-list item, shoot the after photo from the same position and distance as the before photo. Side-by-side proof beats a written description every time.
- Run the end-of-shift checklist. Upload to both backup destinations, confirm originals are preserved, tag every photo to its job before leaving site.
Pro Tip: Tie your capture calendar to billing cutoffs, not just calendar weeks. If draws go out on the 15th and 30th, your bi-weekly progress shots should land a day or two before each cutoff, so the documentation matches the invoice.
Legal and Privacy Rules for Jobsite Photos
Jobsite photos carry legal weight in both directions. They protect you in a dispute, and they can expose you if handled carelessly.
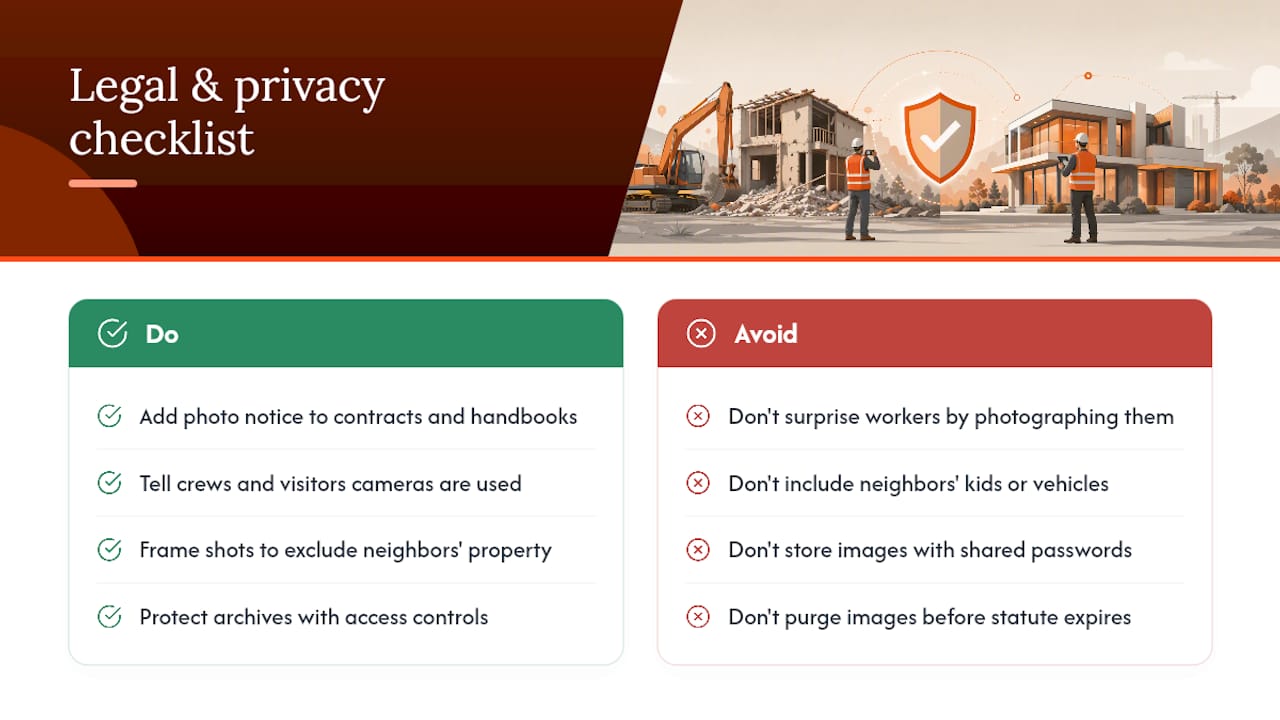
Get written notice into your subcontractor agreements and employee handbooks that photo documentation is standard practice on every jobsite. Crew members and visitors should know cameras are part of the job before they show up, not find out after they’re in a frame. For sites near residential property, be deliberate about what falls inside the shot. A wide progress photo that happens to capture a neighbor’s yard, kids, or vehicle can raise privacy concerns even when your intent was purely to document your own work.
Storage carries its own exposure. Photos containing addresses, GPS coordinates, and project details are sensitive if a laptop gets lost or a cloud account gets compromised. Treat your photo archive with the same access controls you’d apply to financial records, limited logins, no shared passwords, and a clear policy on who can export images off the platform.
Retention matters as much as capture. Many contracts and statutes of limitations extend years past project completion, so a photo archive needs to survive longer than the project team does. Losing your evidence three years after a job closes, right when a latent defect claim surfaces, defeats the entire purpose of having shot the photos in the first place.
Turning Photos Into Communication Tools for Stakeholders
Owners, lenders, and inspectors don’t want to dig through a camera roll. They want a clear before-and-after story, told fast.
Build client-ready albums organized around milestones, not raw chronology. A lender reviewing a draw request wants to see exactly what work justifies the payment, framing before-and-after pairs around the specific scope in that draw makes approval faster and disputes rarer. An owner checking in on a renovation wants the same thing in a simpler form: what did this space look like Monday, and what does it look like now.
Side-by-side before-and-after pairs shot from the same vantage point do more communication work than any written status report. They resolve the “wait, what did you actually do” conversation before it starts. For punch-list closeout specifically, pairing the defect photo with the same-angle repair photo gives inspectors and owners instant visual confirmation, no back-and-forth needed.
Keep a separate, curated set apart from the full working archive. Your working archive holds everything, thousands of images tagged by stage and trade. Your stakeholder-facing album holds the twenty or thirty images that actually tell the story of the job. Mixing the two means owners scroll past rough-in photos of conduit runs looking for the kitchen remodel they actually care about.
Connecting Photo Records to Project Management Software
A photo archive that lives apart from your project schedule, budget, and punch lists is a photo archive nobody checks. Integration is what keeps documentation from becoming a separate chore.
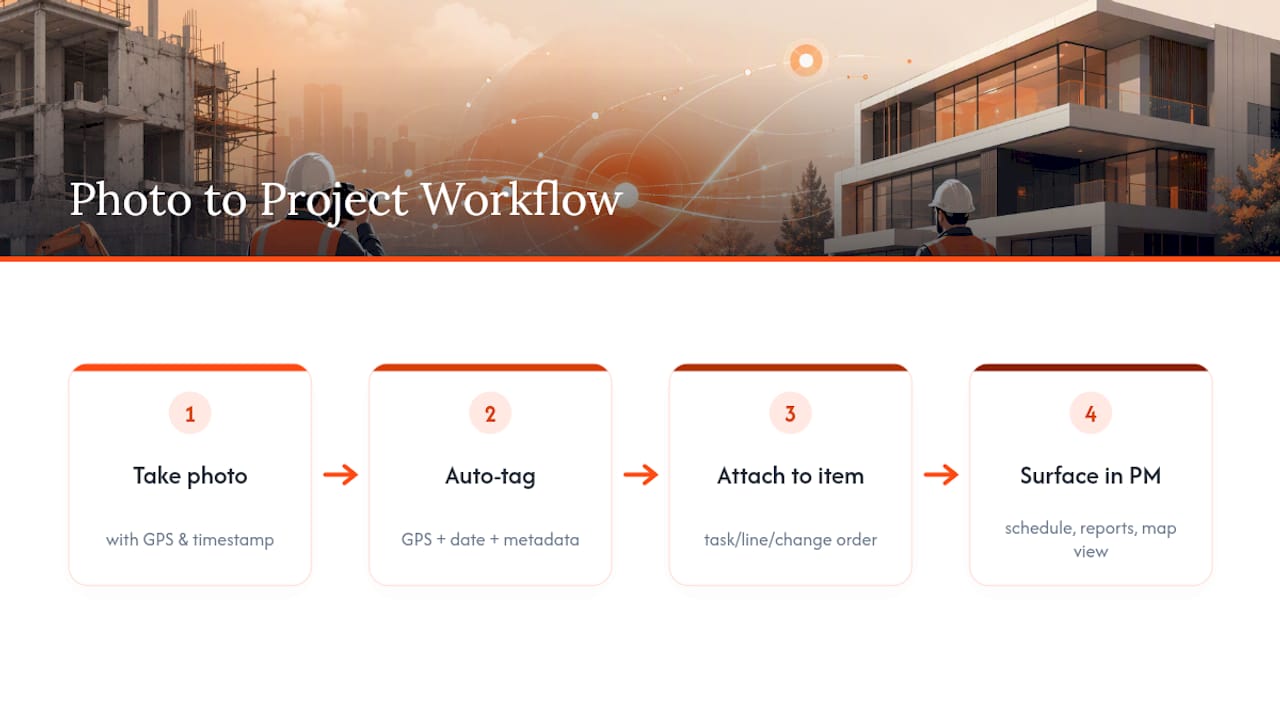
At minimum, your photo platform should let you attach images directly to specific line items, tasks, or change orders inside whatever project management tool your team already runs. When a punch-list item closes, the after photo should live right next to that closed item, not in a disconnected folder three clicks away.
Look for platforms that support API or direct integration with scheduling and budgeting software, so a photo tagged to a specific phase automatically shows up when someone pulls that phase’s status report. Map and timeline views matter here too, being able to see every photo pinned to its location on a site plan, filtered by date range, turns a static archive into something a superintendent actually uses during a walkthrough.
Whatever platform you choose, avoid duplicate systems. If your crew uploads photos to one app for daily logs and a different app for the official record, files drift out of sync fast, and you never know which version is current.
Why Disciplined Photo Records Pay Off Beyond Documentation
Lenders release draws faster when the photo evidence matches the pay application without a follow-up call. Punch lists close faster when a same-angle after photo settles the question instead of a site visit. And when a claim does surface, months or years after the work, the team with dated, tagged, backed-up originals has a real record instead of a memory.
The administrative math matters too. Automated tagging and location pinning turn what used to be an hour of folder-hunting into a search that takes seconds, and that time savings compounds across every draw, every punch list, and every dispute a company handles in a year.
What surprises most teams isn’t the technology. It’s how much the discipline of consistent tagging, backed by automation instead of manual entry, changes behavior on-site. Crews shoot more carefully when they know a photo actually gets used, not filed and forgotten.
— Will
How Ditch Turns This Playbook Into a Daily Habit
Everything in this guide, the tagging, the GPS pinning, the stage labeling, works best when it happens automatically instead of relying on a crew member typing metadata into a phone at the end of a twelve-hour shift. That’s the gap Ditch closes: it reads jobsite photos and tags equipment, GPS location, work type, and time without anyone touching a keyboard, then groups related shots into searchable sessions and albums.
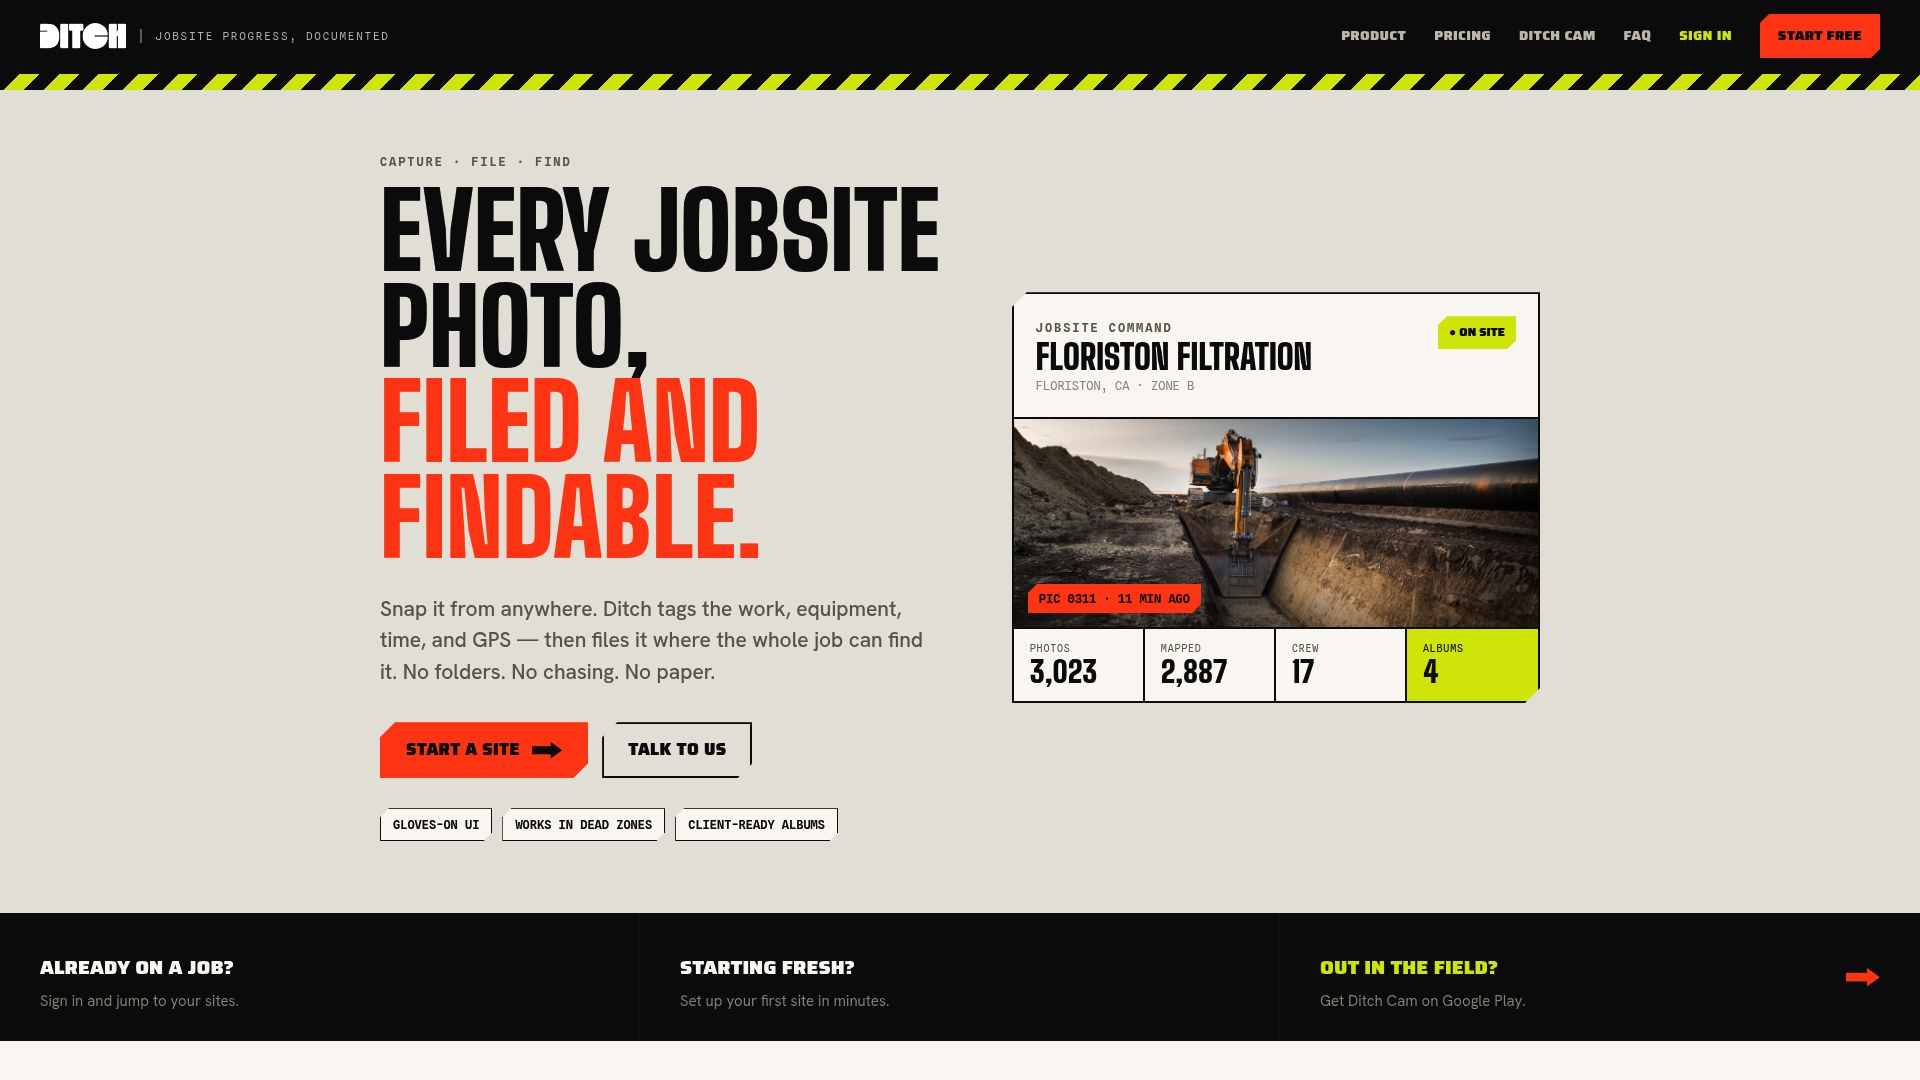
Some platforms offer map and timeline views that let you pull up every photo from a specific location or date range in seconds, turning a photo archive into an actual record instead of a folder nobody opens. Pricing often runs on jobsites and storage, not per-user seats, so adding crew members may not add cost. If you want to test the workflow before committing, start with the free single-jobsite plan and track how much retrieval and admin time drops over your next billing cycle.
Sources
- Construction Site Documentation: Photo Evidence Checklist for Contractors | TimeStamp Camera
- AIA Best Practices: Using photography to evaluate on-site work
- MasterSpec photographic documentation requirements (UMich excerpt)
- AACE recommended practice for construction photography
- Field photo documentation: making the jobsite photo a record - Anvilfield
FAQ
What Makes a Construction Photo Legally Defensible?
A defensible photo needs a visible date and time stamp, GPS coordinates, and a project tag burned into the image itself, plus a preserved original file kept in backup storage. The TimeStamp Camera checklist treats these as baseline requirements, not optional extras.
How Often Should You Take Progress Photos on a Jobsite?
Shoot daily during active trade work like framing or MEP rough-in, and weekly or bi-weekly during slower phases. MasterSpec’s periodic documentation guidance recommends regular periodic intervals as a standard baseline tied to payment cycles.
What Is a Before-Cover-Up Photo?
It’s a photo taken in the last hour before work gets concealed, rebar before a pour, wiring before drywall goes up. Once the material covers it, that evidence is gone, which makes this the single highest-value capture window on any job, according to field documentation guidance.
How Much Does Ditch Cost for a Construction Team?
Ditch offers a free plan for single-jobsite use, with paid tiers scaling from a Crew plan starting under fifty dollars per month up to an Operator plan priced in the hundreds per month, priced by jobsites and storage rather than per user.
Should You Keep the Original Photo File or Just the Stamped Version?
Keep both. Store the unedited original alongside any stamped or annotated share copy so the chain from raw capture to shared image stays intact, a practice the TimeStamp Camera evidence checklist recommends for maintaining an unbroken record.